The Comprehensive Guide to Portaging Like a Pro

We all took our first portage somewhere. From those first tender rods on wobbly legs, we each struggled to carry all our gear from lake to lake. For many of us, this was also a time of questions: “Why did I bring so much gear?”, “Why is my canoe so heavy?”, “Am I in good enough shape for this?”, or “I should have listened to…” With time, the routines normalize, the lessons are learned, and the body acclimates to swapping places with the canoe for short stretches. As a person who has portaged many, many times these past ten years in particular, I feel that I’ve developed my rhythm. Of course, that can look different depending on my group, my gear, the season, or the length of the portage. If you feel the urge to become a professional portager, or are simply looking for a somewhat satirical approach to improving your portaging experience, perhaps somewhere in this encyclopedic guide from a prolific portager you may find the keys to success. With any luck, I might even be able to help elevate the humble portage from the doldrums of your trip’s memory into the complicated and fascinating transition from one lake to another that can positively contribute to your story of adventure.

Portage Avoidance:
The first trick towards becoming a professional portager is learning when to portage. An old saying is that all portages exist for a reason, and often they do, though sometimes their purpose has ceased to exist or has changed in a manner that makes the portage less necessary. Inspect possible routes around. First, check if the circumvention of a portage may be carried out safely. If it can’t, then portaging is the correct call. Second, check if it reduces your travel time or if it increases your scenic value, or the value of your overall experience. If going around is the better option, this may be accomplished by simply paddling around or by running the rapids, lining the rapids, skipping through the boulder pile, navigating a log jam, or by various other creative means.

It’s All About Timing
One of the most important things to remember is that a portage’s difficulty is entirely subjective to its timing. Did you hit the portage early in the season with a long winter of minimal activity still taxing your abilities? That might be a tough portage for you. How about the weather? Is it raining, snowing, sleeting, or sunny? The portage will feel different depending. Portaging in the dark is a unique experience that can lead to seemingly invisible obstacles and a perceived longer trail. Did you hit the portage late in a travel day? That too can impact how you feel. Keep the timing in mind because you can strategize a portage’s placement. If you hit a tough portage at the correct time, it’ll feel far easier than you ever thought possible.

A Smile’s Worth Five
It’s a cheesy phrase, but I like to use it with every group I’ve guided. A smile is worth five… degrees, minutes, calories, pounds… whichever. The point is that most of the negative experiences in canoe country and in life are defined by our attitudes and approaches towards them, and portaging is not immune to this phenomenon. This is especially true with the “storybook portages,” those portages which are exceptionally long, incredibly steep, or the ones your friend or the outfitter warned you about. A bit of preparation beforehand, and a properly calibrated headspace, can elevate that march of discomfort into a less challenging or perhaps, dare I say it, pleasurable experience. Before this notion causes you to close this page, pause for a moment. I know you are wondering how any trail taken with an 80-pound hunk of aluminum on your head could be anything less than a parade of hardship, and I hear you. I’ve been there. I’ve portaged canoes with snapped yokes, bouncing the hull on my head as I went. I’ve triple-packed. I’ve portaged with two surplus frying pans carabinered to my life jacket. I’ve portaged on 100-degree days and in 7″ of snow. I’ve portaged through the densest burn-zone thicket and across crosswalks in a shopping center. The point is, I understand that portaging isn’t always fun, but I do find joy in the portage. A coworker reflecting at the end of my second guide season marveled at this. She recalled that I had mentioned enjoying portaging in our staff training trip and how strange that sounded then. She had begun to come around to the idea when she, like me, began discovering beauty in it. The scenery can change slowly in canoe country while paddling. Despite the stark lines in blowdowns and wildfires, the shoreline of many lakes seems a gradient of forest cover where the scenery changes slowly and methodically. On the portages is the opportunity to turn a page quickly as you pass from one lake to another. It’s a chance to encounter the forests up close that seem separated from you on the water. And it’s a chance to encounter the raw wildness and beauty differently than one can from the canoe. The ability to be receptive to that experience hinges on one’s attitude. A person only focused on the discomfort of the yoke pads will see nothing but the rocks at their feet and the pain in their shoulders, but a person perceiving the portage beyond the discomfort has the opportunity to truly appreciate the world around them as the story of their adventure is written.

Delegate Before Departure
One of the least comfortable portages in canoe country is the one taken with an arm-full of extras: paddles stacked as firewood, at-risk fishing rods askew to the side, or a half dozen water bottles hanging as wrecking balls from the lifejacket. Upon approaching the portage, plan for who will be carrying what. In a small group, this can be pretty easy to arrange. With a large group, it’s important to set the precedent that no one should leave with just a pack. The easiest way to delineate responsibility is for the person with the pack to also take extras while their “portaging buddy” (the person paddling bow or stern from them) takes the canoe. In the event of a double portage or too many extras (some discussion of this later) other arrangements may have to be made. Proper packing at the beginning of a trip targets these extras to reduce the amount one person must carry. Stash as much gear inside of a pack as possible. Use creative means for lashing fishing rods or paddles into the canoe. Use carabiners for clipping items on rather than have them loosely carried. The fewer loose items that one has to keep track of, the less miserable their portage and the less chance of creating lost and found. And this all starts with figuring out who is carrying what before stepping on land and beginning the portage. Take your time with this step and you won’t regret it later!

Risk Management
I do not have a specific statistic for this but, in my experience, 9 out of 10 injuries in canoe country happen on the portage, and the vast majority are preventable. Good risk management is the key to avoiding those injuries so you can continue to have a safe and enjoyable trip. Good risk management does not inherently mean avoiding risk. Wilderness trips come with all kinds of risky situations and opportunities for things to go awry. Risk management is your intentional understanding of a situation: what challenges does this portage present, what is the weather doing, how am I feeling, or what task do I have to accomplish? An awareness of these risks allows you to make smart decisions on a portage to avoid preventable mistakes. Remember, dehydration, hypothermia, heat exhaustion, and being under-nourished all have the potential to make a person more clumsy on a portage. This can lead to bad lifts, trips, stumbles, and falls. Rain and snow make open rock or logs extra slippery. Pay attention to these variables and move intentionally for a better overall portaging experience.

Traffic Jam
Anyone who has taken enough BWCA trips has experienced being stuck on a portage with a gaggle of other canoe groups. Portages close to major entry points with numerous groups trying to rush to their favorite campsites for the night can become clogged like a freeway during rush hour. If everyone is efficient and considerate, there shouldn’t be an issue. The problem? Everyone portages differently. With this and the “9 person and 4 watercraft” rule in mind, how do you navigate a jammed portage? To me, if a group is getting ready to pull offshore, I wait for them to clear. If they are heading back for a second trip, I land my group intentionally out of the way if possible. If I have to leave any of my gear at either end of a portage for a return trip, I want to set packs and canoes well off to the side and grouped together. Many portages in canoe country have limited canoe landing opportunities. Do not set your canoe or gear there unless you are moments away from launching! Be considerate of other people’s gear. Don’t move items without permission as tempting as it may be, and avoid putting your gear in the same spot as others to avoid confusion. We all encounter the wonders of canoe country differently, do not be the person who ruins some part of that experience for someone else!

The End is Nigh
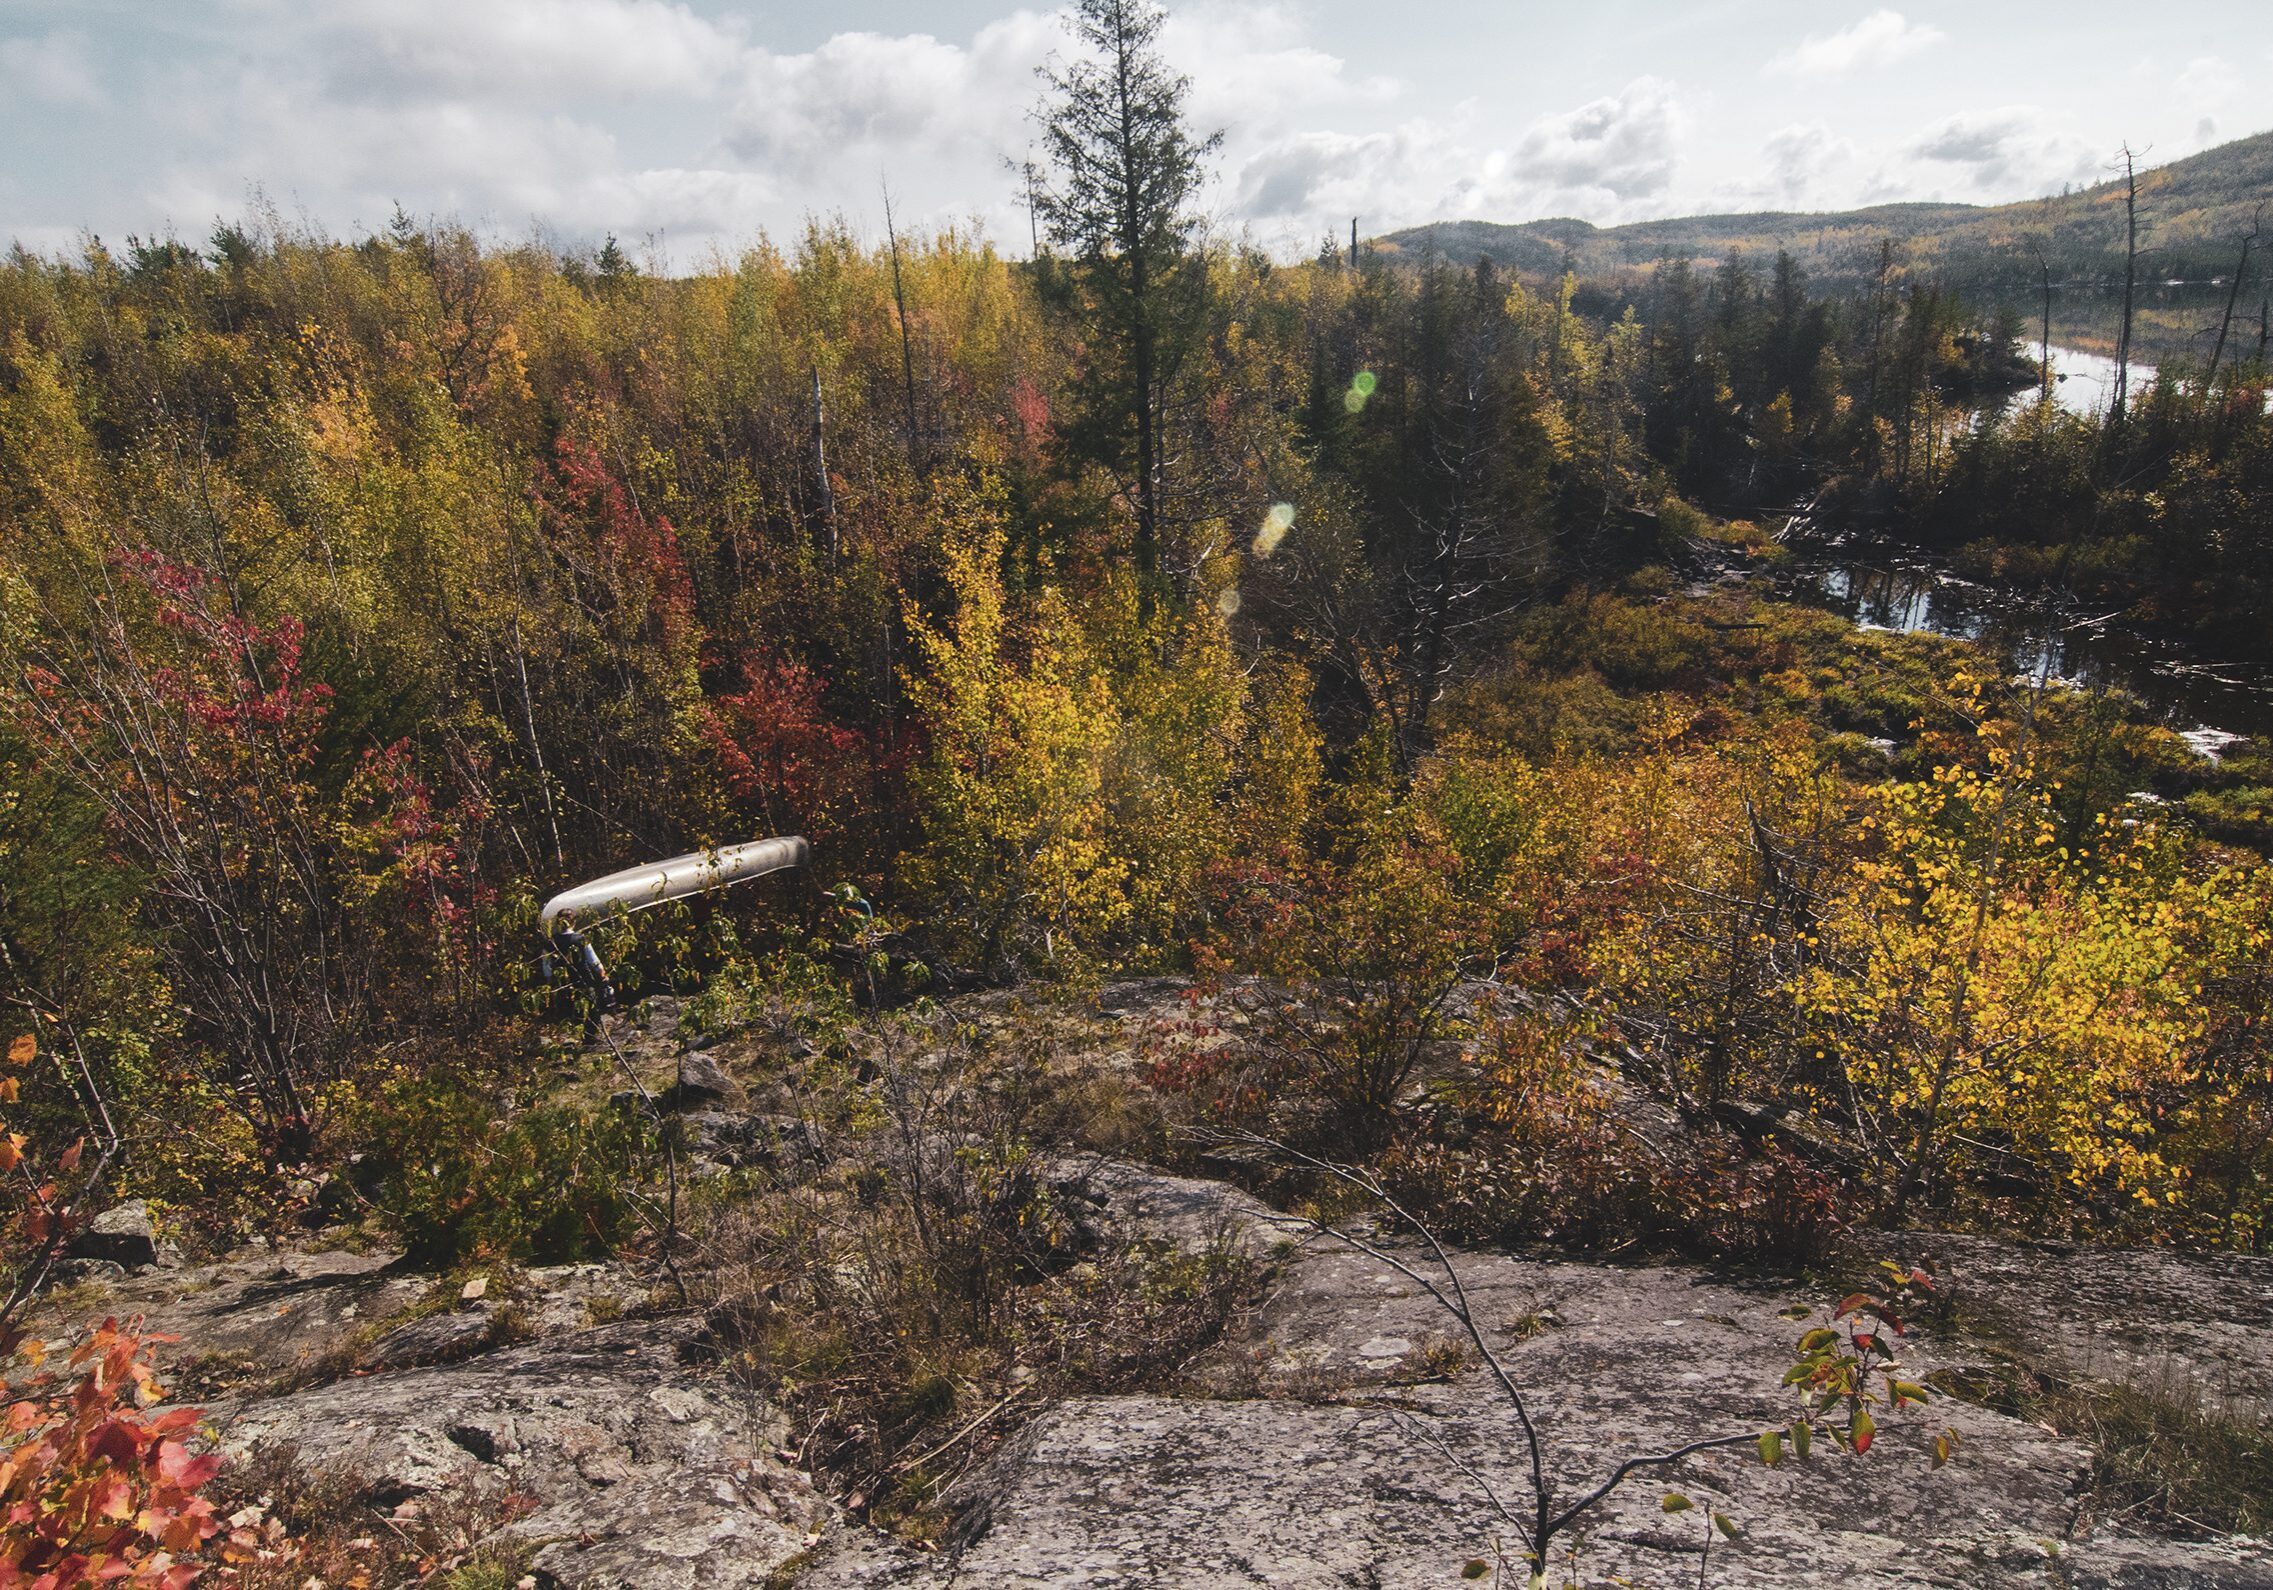
After what seems like an eternity, you crest the final ridge of the portage to the scene of a beautiful lake spreading out across the horizon. After finishing a long portage, it’s sometimes tough to know what to do next. How you finish a portage is crucial to good group relations and efficient travel. As tired as you may be, recovery happens well on the water when you’re out of the way of the bugs and other travelers. The end of the portage should go one of two ways depending on the group and the situation. First, take a brief drink of water and whatever you need to “reset.” I avoid sitting down in this stage to prevent prolonged stagnation. After my reset, I assess the other half of my group. If you are the first one across a short portage, and you’re confident that your group and the rest of the gear are just behind, begin preparing to load the canoe. If you carried the canoe across, get it in the water and ready to load so that as soon as your group member finishes, you can help them take their pack off and place it into the hull. If you crossed with a pack, continue wearing it until the canoe shows up, or place it well off to the side so the canoe portager has the easiest possible route to the water. On longer portages, or in times where double portaging is likely, I put my items well off to the side and start my trip back to find my group mates. If I am the first one across and I have a larger group where numerous people might be struggling, my interaction with the first group member I encounter may go like this: “Hello, how’s it going? Do you need anything right away? I put all of my stuff off to the left side by the big pine and I am heading back to help the others.” In that sentence, I have accomplished a few things. First, I encouraged my group member and offered my help for immediate needs. I could bridge a canoe to give them a moment’s break or fetch a water bottle from their pack for them. Even as a guide though, I don’t like taking items from people. I find that it’s most important for their experience and future group well-being to equip that person, as best I can, to finish under their own power. I also know that the people further back on the portage are usually struggling more so my goal is to equip the second person to finish well and then be available to help others also. I have also made my intentions clear. I am heading back to help. This continues to reinforce the mentality of group camaraderie. I am helping set a precedent that we help each other. And finally, I have given clear instructions on where I put my items down so that if other people are staging us to leave, we can remain organized. This may sound over-detailed, but trust me. A group that helps each other through the portages and is focused on one another’s needs is more likely to stay positive, travel more efficiently, and be better bonded at the end of a wilderness trip than one that sits down and waits at the portage’s end.

Wet vs Dry
This is an argument as old as canoeing, so I won’t dive into it too much. Do you wet-foot or do you dry-foot? I understand the emotional dilemma of plunging into the cold water, and there are some very hard-core proponents of dry-footing who I’ll try not to offend too deeply in this article. For me, wet footing is better for the canoe, less risky for the person, less risky for tipping the canoe, and more efficient. For any canoe, aluminum and royalex included, loading in the water prolongs the life of the hull, reduces repairs necessary over time, and makes heavy loads easier to bear than when the hull is still propped on a rock. From a risk management standpoint, I have seen way too many people slip and fall or tip their canoe by overstepping to avoid getting their feet wet. Climbing in from too deep of water can be a problem too but, in my experience, people that are too focused on staying dry are taking other risks to accomplish that like stepping on a small exposed rock or making over-steps to reach the hull, and that’s when accidents happen. This is also time-consuming as people usually spend extra time trying to avoid the water when they could be pushing off or portaging already. Just my 2 cents…

Canoe Carrying Caper
It’s a steep learning curve for the first time portager, but canoes are self-balancing. Throw in a seat or a heavy patch and that’ll get thrown off, but all properly-designed canoes can be carried without using hands. It just takes practice. Even if you don’t go all the way to hands-free, portaging should not require using more than one. Too often people need both, and it’s usually for one of three reasons. The first is the yoke position. Scoot the yoke forward or back on your shoulders to change the balance point ever so slightly. If a canoe is feeling stern heavy, adjust yourself to be as far back into the yoke as possible. If bow heavy, scoot out to the tips of the yoke pads. These change the amount of the hull on either side of the fulcrum (in this case, you.) Heavier canoes are easier to find the balance point because they are less likely to bounce on your shoulders and change position. The second reason a canoe is off-balance is because of excess water in the hull. If you know you’ve scooped water, tip the bow to the ground until the water drains from the stern and vice versa. This is toughest with aluminum where water and debris can become lodged inside the open ballast. Draining water is a huge key towards a balanced hull. And finally, keep the hull level. I have seen many people tip the bow way up for increased visibility. This makes it especially challenging to keep it on your shoulders and requires way more arm strength. The same goes for tipping it forwards as one may be tempted to do on a steep slope. Beyond finding the balance, there are loads of other tips and tricks. If you get the one-handed method down, keep your arms from going numb by switching off which hand is holding the gunwhale. You can also mitigate this by changing hand postures (back-hand, fore-hand.) Depending on your canoe’s gunwale design, one of these may not be possible. Great yoke pads are a must for limiting discomfort. I don’t know if anyone else has found this phenomenon, but heavy canoes are also capable of restricting blood flow to the brain. I have only found it on canoes 85 lbs. and up for long portages, but it shows up as a temporary, dull headache. A bruised collarbone is longer lasting. Nice yoke pads and/or a nicely contoured yoke help make carrying easier, and can help a portager avoid some of these discomforts.

Don’t Trip Over the Paddles
As briefly mentioned earlier, the one piece of gear that I dread portaging more than any other, more than a first-day food pack or a heavy canoe, is the armful of paddles. If it’s just you and your paddling partner, everything is fine. When three or four canoes worth of paddles are left behind, the “stack of firewood” method is bound to result in dropped paddles along the way. There are a few different methods for carrying the paddles, each with its pros and cons. The first method is the one aforementioned, I call it the firewood method. Stack the paddles in your arms and go. It’s simple and can get the job done on short portages. The briefcase method is more popular with carrying paddles in one’s hand alongside their body. The lumberjack is also common with a paddle or stack of paddles slung over the shoulder. The antenna is sometimes used with forgetful kids by shoving the paddle down the back of their lifejacket. This works as an effective means to not leave gear behind, but it opens up the possibility of a clothesline along the portage. The ski poles method is another I see where one or two unfortunate paddles begin doubling as walking sticks. This is far from ideal and wears down the rock guard. As I have told campers, “This is a paddle. It has one designed purpose, please use it for that purpose only.” The gunnel rest method is one of my favorites. Simply put the paddles up inside the canoe resting on the gunnel/yoke/seat and you have reduced the extras. This is the most elegant solution, but be forewarned, if not strapped in they can prove a falling hazard specifically on steep portages.

Find Your Distractions
Even on the best days, it can be difficult to completely ignore the physical nature of portaging. All it takes is one poorly adjusted strap, one yoke pad sliding off the side, or a long portage, and suddenly the item on your back or shoulders is all you can think about! A successful portage is, in many ways, only as successful as your distraction strategy. One method is tuning into nature. This can require a good deal of focus and mental stamina as a heavy canoe seems to talk louder than the chickadee, but pay attention to the world around you. Focus hard on things you see and hear, and maybe it’ll keep your mind off the challenge. Another method is to sing through the portages. It was said that voyageurs often sang as they traveled, and it’s noted that many people when immersed in the simplistic existence and simultaneous beauty of canoe country, cannot help but do the same. Thankfully, the wilderness is not an audience-rich environment so those of us who usually reserve our vocals for lonely rides in the car can let loose without fear. And finally, conversation. You have a canoe buddy. If you stick together, good conversation can make a portage pass with as much pleasantry as anything. Whatever method you chose, it’s amazing how a little distraction helps the rods slip quickly away.

The Relay vs the Break-Taker vs the March Ahead
Once you have begun to portage, there are a few different schools of thought. The first is what we’ll call the relay. Some people swear by the relay method as the most efficient portaging strategy; I haven’t bought into it yet. The idea is that the first person in the crew portages to the end while the second carries their load nearly halfway. The second person sets down the items they were portaging to head back to the first landing and retrieve whatever remains. Meanwhile, the first person will theoretically reach the end and return to pick up the items from mid-trail. It’s an alternative approach to double portaging (discussed later) which simply allows for smaller rest periods spread out across the portage rather than resting for a whole return trip. As I said, I don’t fully understand it unless your group is bringing a huge amount of gear across a very long portage like the Grand. The second method is the break taker otherwise known as low-and-slow. The idea is that portaging is challenging; take your time and stop throughout the portage. Some heavy-handed group leaders will mandate this for the whole group to stop at one time; I think that’s pretty ridiculous. The validity though of taking breaks can make sense, especially on long portages. Stop, get a bridge for the canoe, and catch up on water, or just breathe for a while. The final method is to march ahead and finish the portage in a single push. This is what I strive for whenever possible as the shoulders eventually reach a numb stage. Taking breaks only makes portaging hurt again. I also prefer the efficiency of getting through a portage, getting back on the water, getting away from the bugs, and clearing the trail for other potential groups.

Obstructing Arbors
This section is where we begin to level up into higher degrees of portaging difficulty because this article isn’t just about survival. This article is about mastering the art of the portage. Encountering down or encroaching trees is all too common along the trail and this section covers some of the high-class maneuvers that one can use to overcome them while portaging a canoe. 

1) Down Tree Below the Knee: In the event of a down tree below the knee, one must do what we call a stepover. It should be as easy as lifting a foot and stepping over the impediment. Most people tend to turn ever-so-slightly when stepping over a down tree. This can cause the canoe to turn and become hooked on brush along the trail. Be aware of these hazards because a hooked canoe can take the portager down with it. Landing on a down tree hurts like mad. 
2) Down Tree Waist High: A down tree at waist height is a conundrum that meets different portagers with different challenges. If the tree is relatively clear of branches, a particularly athletic portager may be able to swing their leg up onto the tree. If needed, saddle the tree before throwing the second leg back over. If the portage corridor is particularly wide or your back particularly flexible, the maneuver can be accomplished without dismounting the canoe. If lots of branches are still on the down tree, one may have no choice but to self-assist a bridge by perching the end of the canoe on a seemingly sturdy branch. Circumvent the impending timber and retrieve your canoe from the other side.

3) Down Tree Shoulder Height: A down tree at shoulder height is a struggle. This is amplified if the aggravating arbor toppled over topography. Steep sections make everything trickier. Usually, shoulder-height logs mandate a setdown. If a person is very flexible, it is possible, albeit tricky, to go to a squat and duckwalk the canoe under. The challenge is that the canoe eliminates upwards visibility so a spotter may be helpful to alert when the canoe has cleared. Without that luxury, set the canoe down on the ground and carry it sideways under the tree. Make sure the stern is well clear before attempting to remount the canoe!
4) Jungle Gym: A log jam of down trees is one of the most precarious situations to portage through since one fall can be very detrimental to one’s health. Step with caution when attempting to cross a log jam with a canoe. Do not attempt jumping maneuvers. Proper risk management would probably suggest setting a canoe down to be the proper response.


5) The Bushwhack: In the event of bushwhacking or heavy brush impeding the trail, the canoe is your armor, rely on it. Before beginning a bushwhack with a canoe, find your balance point and memorize it. Heavy brush pushing on the hull will throw off that balance. Second, get a firm, backhanded grip on the gunnels. Backhanded allows your hands to remain inside the hull where they are protected from the brush. Protecting your face is a different matter. Use the bow to divide the brush and most of it should stay outside of the hull. Watch out for snapbacks!
6) The Encroachers: Every once in a while, a portage will have two trees too close to the trail for the canoe to fit. A common and effective response to this scenario is a quick flip down to your waist. Hold it there and sidestep until you are past the encroachment. Once clear, flip back up as one would normally from the waist. This obstacle can also be overcome by utilizing the single-shoulder maneuver. This maneuver takes some strength and balance to achieve. Pick a side you want to balance on, let’s say for this example that it is the right. Pop the left side of the canoe up in the air. When achieved correctly, you should find a balance point on the side of a yoke pad on your right shoulder. Hold your left arm up to keep the pressure on and portage ahead. Most canoes are significantly narrower from the top to the bottom of the hull than the side to side which allows it to more easily thread a narrow spot on the trail. This is also a convenient method for getting a canoe on top of a car from the side without the risky canoe press maneuver described below.
7) The Landing Blocker: Sometimes a down tree prevents a clean landing. If the water is deep enough to walk, simply pass items up and over to the landing. If the water is too deep for wading, then one of the trickiest maneuvers in canoe country lay ahead. This is a maneuver more commonly used in creek and river canoeing. Step out gingerly to test how much “bob” the log has. If your weight can sink the tree, utilize it to your advantage by submerging the log and passing your canoe over. If the tree doesn’t budge, balance as best as you can. If the tree is too narrow for your balancing comfort, saddle the tree with your feet in the water if needed. From a sturdy position, heave the canoe over the log until your paddling partner can reach it. You may climb back into the bow and then repeat the process for the stern paddler. 

Tackling the Topo
Sometimes the portages are just challenging. No blowdown, fire, or flood will change that because the topography and geology are bound and determined to hinder the portager-by. Here are some pro-maneuvers for encountering topographic impediments to your portage.

1) Boulder Hopping: Boulder hopping is one of the more dangerous maneuvers in the portaging realm because the chance of injury is just so high. A canoe-sized sail on one’s head makes a person a bit top-heavy. One bad step and that weight tips a person over. Boulders can be slippery when wet and they aren’t always as immovable as they seem. Take intentional steps, test them when possible, and always be aware of your surroundings. A canoe thrown off balance by a stick or rock can make the difference between you completing your leap or getting thrown to the side.

2) Open Face Down: Open stretches of rock heading downhill can be nerve-wracking. First, one has to lean the bow forward to not tail drag behind you which aids in a “being-pulled-forward” feel. Open rock can be slippery, especially when wet. Take your time and choose good, textured surfaces to step on. The risk of a wipeout is that the canoe could cause an inadvertent somersault forward which is best to avoid.
3) Open Face Up: If the open rock face is encountered uphill, one must reverse by raising the bow to clear the slope. This is easier because one can see the bow whereas the downhill maneuver must be done blind. A slip here may land a canoe on top of you; walk carefully.
4) Side-Step: A boulder that is partially impeding a trail is annoying, but may be dealt with the same way as the encroacher listed above. Attempt the single-shoulder maneuver until you have successfully cleared the stone.

5) Shelf: In the event of a shelf mid-portage, assess the possibility of stepping up. If climbing with the canoe is out of the question, bridge the canoe and try to retrieve it from the top. If the shelf is at the end of the portage, attempt to dismount and gently feed the bow off the shelf to the water below. Once the hull meets water, it will support some of the weight. Picking up a canoe from the top of a shelf is risky as it requires bending down further than normal, adding torque to your back. When possible, lift the canoe straight up to your hips as one would do for a controlled lift before swinging it to your shoulders.
6) Amusement Park Restriction: This one’s a rarity but it does happen. There is a famous example along the Granite/Pine River. When two rock faces abut either side of the trail, a person’s height may become an issue. If a person is too short, the canoe may not fit between the faces. If they are a little taller, the canoe clears above the face without issue. In this situation, it’s best to simply find a taller person to portage it, but if you must stubbornly defeat it yourself, treat it as a shelf and follow the protocol of the previous point. One can also overcome a height deficiency by completing a canoe press maneuver. This maneuver is risky and requires a good deal of strength. Essentially, you are trying to hold the canoe up in the arms with your arms locked in a straight position. This can be challenging because it exacerbates any difficulty with balancing the hull. It’s risky because a bunch of weight on outstretched [vertically] arms is a recipe for a shoulder injury. I would personally try it as I know I can do it safely, but this is a move to practice before trying on the trail. Also, avoid if you have a history of shoulder injuries.


Muck, Mire, Muskeg:
Sometimes portages are soggy, goopy, sloppy messes that require a dose of resignation and an adept touch to overcome. Wading through beaver ponds with a canoe on your shoulders may not be everyone’s most jubilating moment, but it usually isn’t as bad as it may seem. There will be mud and water, but this is a canoe trip after all. Usually, it’s just best to take the plunge rather than toe around it. Take shallow steps and be wary of impediments in the water like down trees or rocks. If you sink far enough into mud that you are struggling to extract yourself, here’s what I have found to be best practice. Flip the canoe off your shoulders into the muck. Make eye contact with where the nearest solid ground is. Begin pulling yourself out to hopefully lay on top of the muck. This is an exhausting and dirty process. If a tree or rock is in reach, pulling will be much easier. If you find yourself in the mud pit while double packing (there are just some of those days) tip the canoe right side up and set the pack inside. It’s much easier to extract yourself without carrying gear.

Lifting a Canoe the Right Way:
Picking up a canoe requires balance and leverage far more than strength. Strength can help, but it is not a substitute for balance. Learning to portage a canoe on a beach is one thing, but rarely does a BWCA portage have a flat, open surface for a person to maneuver. To prepare for this, practice plenty of canoe trips before your adventure. Get adept at lifting from both sides (most people have a favorite.) Practice lifting with the canoe at different altitudes (when lifting from the water, the canoe will be higher; when lifting from a higher elevation, the canoe may be lower.) Always face the canoe you are trying to lift as side lifting is tough on the back muscles. Make sure you envision which hand you are reaching across with as you set to flip the canoe. Getting one’s hands crossed is a quick recipe for failure. Make sure you are lifting to put the bow in front of you and the yoke and stern behind. For a purely executed solo lift, one can lift in one motion or two. The two-motion version is more sustainable and involves first lifting to one’s hips. From there, gain momentum by thrusting the canoe upwards and the leverage should flip it to one’s shoulders. Do the reverse motion for setting the canoe down. A single-motion pickup is possible without stopping at the hips but, again, it puts a good deal of torque on the back. One can go for a solo assisted lift where the bow pivots on the ground as you flip. This is not a recommended method as it can wear through the deck plates over time. A two-person lift functions the same way but the second person is helping to get the cane turned while preventing the deck plate from grinding into the ground. A three-person lift is also available for when a person is dealing with a particularly heavy double packing or less-than-ideal footing.

Wear it, Don’t Bear It:
This is another controversial topic: what to do with lifejackets on a portage. Every guide I have known has worn their PFD through the portage because it’s easier than carrying it or finding a pack to stuff it in. You could strap it to the canoe, but that always seems an extra step to me. Wearing the life jacket through the portage saves time, reduces the lose items to find space for, and reduces the chance of forgetting a life jacket somewhere. To me, that makes wearing a life jacket through the portage the smart thing to do.

Double Pack / Double Portage
Another age-old portaging argument is whether to take one portage with all of the gear or multiple portages with a more manageable amount. Much of what a person should or would do when is dictated by their route, timing, weather, weight of gear, and personal variables. There’s no right answer, just pros and cons of each. Double packing (when the amount of gear calls for it) allows for a single trip across a portage. It is faster and more efficient and can be accomplished with a pack and a canoe or with two packs. Double portaging, on the other hand, means each person takes one item, finishes the portage (or other methods like the relay), and return to the beginning for the remainder. Other variations on this method include triple portaging or triple packing, and can be even further exacerbated by an overabundance of luxury items.

Stack It or Front-and-Back It
Double packing with a pack and a canoe is fairly straightforward in that there are minimal options for how a person is to accomplish the task. The overwhelming majority will put a pack on their back and a canoe on top as normal. Double packing two traditional packs, on the other hand, has varying schools of thought with valid supporting arguments for each. The one I see most commonly is probably the front-and-back method. This involves one pack on the front and one pack on the back. Many self-supporting individuals will put the pack on their back first and pick up the second for the front after. To me, this is the inferior method of the front and back because the front pack tends to slide down one’s arms to the elbows, making for an exhausting portage. The more difficult method to set up, but the overall better method for the long-haul, is to place the front pack on first. The second pack should be then added overlapping the shoulder straps of the first. The shoulder straps of the back pack help to hold the front straps in place and can be “locked in” using the sternum strap and waist belt. Beyond the front and back method, I consider the overall superior method for double packing to be the stack-it method. The stack-it method does require at least one hand and so it doesn’t cater as well to carrying paddles alongside but, to be fair, the front-and-back is challenging in that regard as well. The stack-it method involves putting one pack on traditionally, preferably locked in with a sternum strap and waist belt, and then a second pack is tossed up on top of it. The second pack is controlled using the gusset handles which should be available just above the shoulder. Mounting and dismounting packs from this method is more physically demanding, but the overall portaging experience is better with a greater degree of control. The greatest feature is the ability to see one’s feet, reducing the opportunity of tripping or falling due to unforeseen obstacles. Double packing two packs can also be accomplished via the one strap per shoulder method and the grocery bag method, both of which are inferior methodologies often utilized by novice portages and are thus excluded from this article. The double canoe portage is a specialty maneuver that can be accomplished in a small handful of ways, all of which are fairly hull-specific and none of which are practical on a commonly occurring narrow portage. 

Escaping the Equipment: The Turtle, The Meteor, Hull of a Headbutt, Over Easy,
Falling on a portage while under load is a painful and often dangerous proposition. These can result in scrapes, bumps, bruises, the assailence of one’s pride, and the occasional break, sprain, or dislocation. This section however is dedicated to the fact that, if in the rare event you do fall, the load you carry is equally subjected to the laws of gravity. These are some of the more common negative encounters with one’s own equipment that may be experienced on a portage due to a fall.
1) The Turtle: Falling backward with a pack on your back is a position we call the turtle position. If the pack is heavy enough, this can be an unrecoverable posture without removing the pack. Sternum straps or waist belts can be a hindrance in this case. Properly extracting oneself from the turtle position without unstrapping involves forcing oneself over to gain your footing with the assistance of your arms. The turtle position can be made exponentially worse when there is an aquatic element involved.
2) The Meteor: The meteor is the inverse of the turtle. It is so named because, in the act of falling, the pack meteorically forces the portager into the ground. Much like a rerun of the Wiley Coyote and an anvil, a heavy pack can cause extra force upon your body reaching the ground. Despite often being more painful on the initial landing, the recovery is easier than from the turtle. Just like the turtle position, an aquatic showing of this position can prove detrimental.
3) The Submarine: If one trips into the water while carrying a canoe, the results can be humiliating. The canoe has the potential of crumpling the portager-turned-victim into a submariner, forced into the water by the hull. This can be disorienting as a sudden darkness is caused by the canoe-umbrella. It’s also a challenging one to recover from depending on one’s posture. Call for help and maybe a group member will help you….as soon as they quit laughing!
4) The Over Easy: Sometimes when a hard downward step is taken, a canoe is dropped too hard, or the long-term impacts of sub-par canoe construction are manifested, the unthinkable happens: the yoke snaps. A broken yoke is not truly a deal breaker, but it is the great multiplier of challenging portaging. Yokes can break in multiple different ways, but the majority of them can be splinted on trail to some degree. However, a broken yoke will have adverse consequences. Often, a splinted yoke is more flexible than initially intended leading to a drum beat rhythm as the hull bounces on the head of the portager with each passing step. A broken yoke also forces a difference of set down, preferably one where a person sets the canoe in the water using the gunnels or a bear hug method of wrapping their arms around the hull. Broken yokes can happen with all kinds of canoes. Old fiberglass yokes are particularly at risk, but wooden yokes on heavy royalex or plastic hulls are also vulnerable, especially after a prolonged lack of maintenance. Aluminum yokes can also fail as I learned upon discovering the enthusiastically disposed of evidence a good ways off of the portage. An over-easy situation apparently causes increased feelings of rage in some portagers which may lead them to project the remaining pieces deep into the forest as they begin the arduous task of portaging without, either alone or in tandem.
5) The Hull of a Headbutt: One of the most uncomfortable scenarios encountered during a fall on a portage, this scenario is induced in a variety of ways but the results are almost always the same. The hull of a headbutt is when a canoe’s yoke is unseated from one’s shoulders causing the entire mass of the hull to descend suddenly and rapidly until its downward course is interrupted by one’s cranium. This can be caused by a sudden stop of forward motion such as hitting a tree or a rock with the bow while portaging, it can be caused by a tail-hook scenario when the stern is grabbed by a branch or unkind fellow portager, by a sudden loss of balance where the yoke slides off sideways, or in tandem with the previous over easy scenario. Needless to say, a surprise transfer of a canoe from one’s shoulders onto one’s head is an experience to be avoided at all cost. If dropped hard enough, or with a great enough weight, put the portager into concussion protocol. Symptoms may include dizziness, forgetfulness, light sensitivity, and a prolonged headache. I can attest from personal experience that the aluminum version of the hull of a headbutt is particularly unpleasant

Author Bio:

Riley Smith

Riley is the Director of Community Engagement and Public Relations for Portage North and Sundog Sport. He comes from a background in wilderness programing and environmental education with four years of BWCA outfitting and guiding before taking this role. In his free time, he can be found out canoeing, hiking, snowshoeing, capturing photography, and writing.
Posted in

Leave a Comment